



Meta Description: Use this offshore fishing boat checklist to inspect fuel, batteries, electronics, safety gear, bilge pumps, fishing equipment, clothing, and deck footwear before leaving the dock.
Suggested URL Slug: offshore-fishing-boat-checklist
Primary Keyword: offshore fishing boat checklist
Secondary Keywords: pre-departure boat checklist, offshore fishing safety checklist, what to check before going offshore, fishing boat inspection checklist, offshore fishing gear list, boat safety equipment checklist
Search Intent: Informational
Offshore fishing begins long before the first line enters the water.
A successful trip depends on preparation at the dock, where small problems are much easier to identify and correct than they are several miles offshore.
A weak battery, blocked bilge pump, missing drain plug, damaged fuel line, expired fire extinguisher, or forgotten rain jacket may seem like a minor inconvenience at the marina. Once the boat is beyond reliable cell service and exposed to changing weather, the same problem can become much more serious.
A pre-departure inspection does not need to be complicated.
The goal is to confirm that the boat is mechanically ready, properly fueled, safely loaded, equipped for communication, and organized for the expected fishing conditions.
Every vessel is different, and this checklist cannot replace the boat manufacturer’s instructions, local boating laws, Coast Guard requirements, or the judgment of an experienced captain.
It can, however, provide a practical framework for recreational anglers preparing for a day offshore.
This guide covers the major items to inspect before leaving the dock, including weather, fuel, batteries, engines, bilge systems, navigation equipment, safety gear, fishing tackle, clothing, food, water, deck boots, and emergency planning.
Why a Pre-Departure Checklist Matters
Offshore trips involve more variables than short inshore outings.
The boat may travel far from:
- Marinas
- Fuel docks
- Repair facilities
- Sheltered water
- Cell towers
- Medical assistance
- Safe anchorages
- Rapid weather updates
Conditions can also change during the trip.
A calm morning may develop into:
- Strong wind
- Rough seas
- Thunderstorms
- Fog
- Reduced visibility
- Heavy rain
- Cold spray
- Intense heat
A checklist helps prevent important tasks from being forgotten during the excitement of loading rods, bait, ice, passengers, and food.
It also gives the captain an opportunity to confirm that everyone understands the trip plan and basic safety procedures.
Build a Checklist for Your Specific Boat
A general list is useful, but the best checklist is customized for the vessel.
Include items related to:
- Engine type
- Fuel capacity
- Battery layout
- Bilge system
- Electronics
- Boat length
- Passenger capacity
- Fishing style
- Home port
- Typical offshore distance
- Local weather patterns
- Required safety equipment
A center-console with twin outboards has different inspection needs from a diesel-powered sportfishing boat.
Use the manufacturer’s operating manual as the primary reference for mechanical and maintenance procedures.
Update the checklist when equipment is added, removed, repaired, or replaced.
Check the Weather Before Loading the Boat
Weather should be reviewed before the trip and again shortly before departure.
Look at more than the chance of rain.
Important conditions include:
- Wind speed
- Wind direction
- Wave height
- Wave period
- Swell direction
- Thunderstorm risk
- Visibility
- Fog
- Air temperature
- Water temperature
- Tide
- Current
- Expected weather changes
- Small-craft or marine advisories
A forecast that looks acceptable on land may still produce uncomfortable or unsafe offshore conditions.
Short wave periods can create steep, closely spaced seas even when the reported wave height appears moderate.
The captain should understand how the forecast relates to the specific boat, passenger experience, route, and distance from shelter.
Review More Than One Forecast Source
Marine forecasts may vary.
Compare information from:
- Official marine weather services
- Local buoy observations
- Radar
- Wind forecasts
- Tide and current data
- Marina reports
- Local captain knowledge
Recent buoy readings help show what is actually happening offshore rather than only what was predicted earlier.
When information conflicts, use conservative judgment.
Do not allow a fishing schedule, tournament plan, or hotel reservation to pressure the group into departing during unsuitable conditions.
Establish a No-Go Decision
Before leaving home, decide which conditions would cancel or delay the trip.
Possible no-go factors include:
- Severe thunderstorm risk
- Strong wind beyond the captain’s comfort level
- Mechanical warning lights
- Insufficient fuel
- Failed communication equipment
- Inoperative bilge pump
- Missing safety gear
- Poor visibility
- Passenger health concerns
- Unresolved electrical problems
A clear decision standard reduces the temptation to ignore a serious concern after everyone has arrived at the marina.
There will always be another fishing day.
File a Float Plan
A float plan tells a responsible person where the boat is going and when it should return.
Include:
- Captain’s name
- Passenger names
- Boat description
- Registration number
- Departure marina
- Planned departure time
- Fishing area
- Route
- Expected return time
- Vehicle information
- Communication methods
- Emergency contact instructions
Send the plan to someone who is not on the boat.
Update that person when the route or return time changes.
A float plan is useful only when someone knows what action to take if the boat does not return as expected.
Confirm Passenger Information
Before departure, know:
- How many people are onboard
- Whether anyone has medical conditions
- Whether anyone has severe allergies
- Whether required medication is available
- Who can operate the boat
- Who has offshore experience
- Who is prone to seasickness
- Whether anyone has limited mobility
Passengers should know where personal medication is stored.
The captain should not be surprised by a serious health issue after the boat is offshore.
Inspect the Hull From Outside
When the boat is on a trailer or accessible at the dock, inspect the visible hull.
Look for:
- Cracks
- Impact damage
- Loose fittings
- Missing hardware
- Damaged trim tabs
- Propeller damage
- Fishing line around propellers
- Damaged transducers
- Loose drain fittings
- Signs of water intrusion
- Unusual stains
- Trailer damage
Pay attention to anything that changed after the previous trip.
A new mark may indicate contact with a dock, submerged object, trailer hardware, or debris.
Do not launch or depart with unexplained structural damage.
Confirm the Drain Plug
A missing drain plug is one of the simplest and most serious preventable launch problems.
Before launching, confirm that:
- The correct plug is installed
- It is secured properly
- The fitting is undamaged
- Spare plugs are onboard
- Other drainage fittings are in the correct position
Some boats use multiple plugs or specialized drainage systems.
Follow the manufacturer’s instructions.
Do not rely on memory alone.
Make the drain-plug check a physical item on the written departure list.
Inspect Through-Hull Fittings
Check accessible through-hull fittings, valves, and hoses.
Look for:
- Cracks
- Corrosion
- Loose clamps
- Damaged hoses
- Leaks
- Stiff valves
- Missing plugs
- Unusual movement
Know where the seacocks are located and how to close them.
Passengers who may assist in an emergency should also know their locations.
Do not operate a valve forcefully when its condition is uncertain.
Marine plumbing problems should be repaired before offshore use.
Check Bilge Condition
Open the bilge area when accessible.
Look for:
- Excess water
- Fuel smell
- Oil
- Loose wiring
- Debris
- Fishing line
- Corrosion
- Leaking hoses
- Failed clamps
- Unusual stains
A small amount of clean water may have an identifiable cause.
Fuel, oil, or unexplained water requires investigation.
Do not ignore a new smell or liquid because the pump can remove it.
The source still needs to be identified.
Test the Bilge Pumps
Confirm that automatic and manual bilge-pump functions work according to the boat’s design.
Inspect:
- Pump activation
- Float switches
- Discharge flow
- Wiring
- Fuses
- Backup pump
- High-water alarm
A pump that makes noise may still be blocked or unable to move water effectively.
Check discharge rather than relying only on sound.
Keep debris away from pump intakes.
Fish scales, plastic, bait packaging, and loose line can interfere with the system.
Inspect Scuppers and Deck Drains
The cockpit must be able to remove rain, spray, and washdown water.
Check that drains and scuppers are free from:
- Fish scales
- Bait
- Leaves
- Fishing line
- Plastic
- Seaweed
- Mud
- Ice
Do not push debris deeper into the drain.
Collect and dispose of it.
Slow deck drainage may indicate a blockage, loading problem, or maintenance issue that should be corrected before departure.
Inspect Fuel Level
Do not rely solely on a fuel gauge without understanding its accuracy.
Confirm the expected usable fuel and calculate the trip conservatively.
Account for:
- Offshore distance
- Return distance
- Trolling time
- Sea conditions
- Current
- Detours
- Searching for fish
- Idling
- Reserve fuel
A commonly used planning principle is to allocate a portion for the outbound trip, a portion for the return, and a significant reserve.
The correct reserve depends on the vessel, route, and conditions.
Use the boat manufacturer’s data and the captain’s real fuel-consumption records.
Inspect the Fuel System
Look for:
- Fuel odor
- Leaks
- Cracked hoses
- Loose connections
- Damaged primer bulbs
- Water in filters
- Corrosion
- Tank-vent issues
- Warning indicators
Never ignore a fuel smell.
Stop and identify the source before operating engines or electrical equipment.
Fuel-system work should be completed according to manufacturer guidance and applicable marine safety standards.
Check Fuel Filters and Water Separators
Inspect filters according to the engine manufacturer’s maintenance schedule.
Possible warning signs include:
- Water contamination
- Restricted flow
- Dirty filter elements
- Engine hesitation
- Hard starting
- Reduced power
Carry appropriate spares when recommended.
Do not attempt unfamiliar offshore repairs without training.
Preventive replacement at the dock is safer than troubleshooting a fuel problem at sea.
Inspect Engine Oil and Fluids
Check required levels according to the engine manual.
These may include:
- Engine oil
- Coolant
- Hydraulic fluid
- Steering fluid
- Gear lubricant
- Trim-system fluid
Look for leaks around the engine and mounting area.
Do not overfill fluids.
Use only the specified products and procedures.
If a level has changed unexpectedly since the last trip, investigate the cause rather than simply adding more fluid.
Inspect Outboard Engines
For outboard-powered boats, check:
- Mounting hardware
- Propellers
- Skegs
- Lower units
- Hydraulic steering
- Trim and tilt
- Cowling security
- Fuel lines
- Control cables
- Water intakes
- Anodes
Remove fishing line from propeller shafts using the correct procedure.
Line can damage seals and allow water into the lower unit.
Propeller damage may create vibration and reduce performance.
Inspect Inboard or Diesel Systems
For inboard-powered boats, inspect systems according to the manufacturer’s checklist.
Possible items include:
- Cooling-water intake
- Seacocks
- Belts
- Hoses
- Strainers
- Exhaust system
- Oil level
- Coolant
- Transmission fluid
- Shaft seals
- Engine-room ventilation
- Fuel filters
A clean engine compartment makes leaks easier to identify.
Do not depart when unexplained fluid, odor, smoke, or warning indicators are present.
Start the Engines Before Departure
Run the engines according to marina rules and manufacturer procedures.
Confirm:
- Normal starting
- Cooling-water flow
- Stable idle
- Normal voltage
- No warning alarms
- No unusual smoke
- No fuel smell
- No vibration
- Proper control response
- Normal gauges
Listen for changes from the previous trip.
An unfamiliar sound deserves investigation.
Do not assume it will disappear after the boat reaches open water.
Check Propeller and Steering Response
Before leaving the slip or launch area, confirm:
- Steering moves smoothly
- Engines turn correctly
- Throttle and shift controls respond
- Trim systems work
- No binding is present
- Hydraulic systems show no visible leaks
Perform checks in a controlled area.
A steering or control problem must be corrected before offshore travel.
Inspect Batteries
Check the battery system before departure.
Confirm:
- Adequate voltage
- Secure terminals
- Clean connections
- Tight hold-downs
- No swelling
- No leaking
- Proper selector-switch position
- Working charging system
Know which battery starts each engine and which powers house systems.
The captain should understand the correct sequence for battery switches.
Do not change switch positions under load unless the system manufacturer permits it.
Test Battery Isolation and Backup Plans
A multi-battery system is useful only when it is configured and used correctly.
Confirm:
- Starting batteries are healthy
- House loads are separated appropriately
- Emergency parallel function works
- Battery switches are labeled
- Crew knows the basic procedure
- Portable jump equipment is charged when carried
Do not allow entertainment equipment, lights, pumps, and electronics to drain the only starting battery.
Inspect Wiring
Look for accessible signs of electrical problems:
- Loose wires
- Exposed conductors
- Corrosion
- Burn marks
- Hot connections
- Unsupported cables
- Water around electrical equipment
- Repeated fuse failures
Do not replace a fuse with a larger rating to stop it from blowing.
A repeated failure indicates a problem that must be diagnosed.
Offshore electrical repairs can be difficult and dangerous.
Correct issues at the dock.
Test Navigation Lights
Navigation lights may be required before sunrise, after sunset, or during restricted visibility.
Confirm that:
- Bow lights work
- Stern light works
- All-around light works
- Bulbs or LEDs are bright
- Lenses are clean
- Fixtures are secure
- Spare components are available when appropriate
Do not assume a daytime trip will return before dark.
Fishing, weather, mechanical delays, or slow travel can extend the trip.
Test Electronics
Power on the boat’s electronics before departure.
Check:
- Chartplotter
- GPS
- Depth sounder
- Fish finder
- Radar
- VHF radio
- AIS when installed
- Compass
- Autopilot
- Engine displays
- Weather receiver
- Charging ports
Confirm that the chartplotter has current and appropriate charts.
Electronics are valuable but should not be the only navigation method.
Carry backups appropriate to the route and vessel.
Review the Route
Before leaving the dock, review:
- Harbor exit
- Channel markers
- Restricted areas
- Shallow water
- Bridges
- No-wake zones
- Offshore hazards
- Fishing location
- Alternate fishing areas
- Emergency ports
- Return route
- Fuel stops
Mark important waypoints before departure rather than trying to enter them during rough water.
The captain should understand the route without relying blindly on an autopilot or single electronic display.
Check the Compass
A magnetic compass provides an important backup.
Confirm that it is:
- Visible
- Undamaged
- Free from obvious interference
- Lit when required
- Consistent with expected headings
New electronics, speakers, metal equipment, or wiring changes may influence compass accuracy.
Significant deviation should be investigated.
Test the VHF Radio
A marine VHF radio is one of the most important offshore communication tools.
Check:
- Power
- Volume
- Squelch
- Antenna
- Microphone
- Channel selection
- Digital Selective Calling configuration
- GPS connection where applicable
Know the correct emergency and calling procedures for your region.
A fixed-mount radio with a properly installed antenna generally provides better range than a small handheld unit.
A waterproof handheld VHF can serve as a valuable backup.
Verify Emergency Identification Information
Where applicable, confirm that emergency communication equipment is properly registered and updated.
This may include:
- DSC identity
- EPIRB registration
- PLB registration
- Vessel information
- Owner contact information
- Emergency contacts
Registration information should reflect the current owner and boat.
Expired or inaccurate records can delay emergency response.
Inspect the EPIRB or PLB
Check emergency beacons according to manufacturer instructions.
Confirm:
- Registration is current
- Battery expiration has not passed
- Housing is undamaged
- Mounting bracket is secure
- Water-activation features are unobstructed
- Crew knows where it is
- Crew understands basic activation procedures
Do not perform a real emergency activation as a casual test.
Use only the manufacturer-approved self-test procedure.
Charge Phones and Backup Devices
Cell service may be limited offshore, but phones still provide useful tools such as:
- Stored charts
- Weather information
- Camera
- Notes
- Emergency contact data
- Marina information
Charge phones fully and store them in waterproof protection.
Also charge:
- Handheld VHF radios
- Flashlights
- Headlamps
- Satellite communicators
- Cameras
- Portable battery packs
A phone should not replace marine communication and navigation equipment.
Inspect Personal Flotation Devices
There should be appropriate wearable flotation equipment for every person onboard.
Check:
- Correct quantity
- Correct size
- Proper condition
- Accessible storage
- Working buckles
- No damaged fabric
- No mildew
- No missing components
Children and certain activities may require specific flotation practices under local law.
Inflatable devices must be maintained according to manufacturer instructions.
Check inflation systems, status indicators, cylinders, and expiration dates where applicable.
Make PFDs Accessible
A flotation device buried beneath tackle and coolers is difficult to reach during an emergency.
Store PFDs where passengers can access them immediately.
Passengers should know:
- Where they are
- Which one fits them
- How to put one on
- When the captain expects them to be worn
During rough weather, nighttime travel, bar crossings, or other high-risk conditions, wearing a PFD before a problem develops may be the safest practice.
Inspect Throwable Flotation Devices
Where required or appropriate, inspect throwable flotation equipment.
Confirm that it is:
- Accessible
- Unsecured from unnecessary storage straps
- In good condition
- Equipped with a line when appropriate
- Known to the crew
Do not place heavy gear on top of it.
The person throwing it should avoid entering the water.
Check Fire Extinguishers
Inspect fire extinguishers according to applicable requirements and manufacturer guidance.
Confirm:
- Correct type
- Correct quantity
- Accessible mounting
- No corrosion
- No damage
- Pressure indicator in the proper range when present
- Inspection date current
- Crew knows the location
Do not store extinguishers behind coolers, tackle, or bags.
Fire response must begin quickly.
Check Visual Distress Signals
Inspect required visual signaling equipment.
This may include:
- Flares
- Electronic distress lights
- Signal mirror
- Orange distress flag
- Smoke signals
Check expiration dates and physical condition.
Store signaling equipment in a dry, accessible location.
Everyone should understand that distress signals are for emergencies and must be used according to applicable rules.
Test the Horn and Sound Devices
Confirm that the boat has working sound-producing equipment.
Check:
- Electric horn
- Whistle
- Bell where required
- Backup manual signaling device
Sound signals may be necessary during reduced visibility, maneuvering, or emergency communication.
A small whistle attached to a PFD can provide personal backup.
Inspect First-Aid Supplies
A marine first-aid kit should match the trip length, passenger count, and distance from medical assistance.
Inspect for:
- Expired items
- Water damage
- Missing bandages
- Used supplies
- Damaged packaging
- Required personal medication
Fishing-specific concerns may include:
- Hook injuries
- Cuts
- Fish spines
- Burns
- Blisters
- Seasickness
- Sunburn
- Allergic reactions
Keep the kit accessible and dry.
At least one person onboard should know basic first aid.
Carry Seasickness Supplies
Seasickness can affect both comfort and safety.
Passengers who become severely ill may be unable to move safely, follow instructions, or remain hydrated.
Prepare:
- Appropriate medication
- Water
- Light food
- Sealable bags
- Towels
- Dry clothing
- Shaded seating
Medication should be used according to its directions and personal medical advice.
Some products may cause drowsiness.
Inspect Emergency Tools
A practical emergency tool kit may include:
- Adjustable wrenches
- Screwdrivers
- Pliers
- Spare fuses
- Electrical tape
- Hose clamps
- Spare plugs
- Flashlight
- Knife
- Multitool
- Propeller tools
- Spare hardware
- Manufacturer-specific tools
Carry only tools you understand how to use safely.
Store them in a dry, organized container.
Tools scattered around the boat become hazards during rough travel.
Carry Damage-Control Supplies
Depending on the vessel, useful damage-control supplies may include:
- Soft wooden plugs
- Emergency sealing materials
- Hose clamps
- Absorbent pads
- Bucket
- Manual pump
- Strong tape intended for emergency use
- Spare bilge-pump components
These supplies should be compatible with the boat and known to the captain.
Emergency material does not replace preventive maintenance.
Check the Anchor System
Inspect:
- Anchor
- Chain
- Rode
- Shackles
- Connections
- Windlass
- Bitter-end attachment
- Anchor locker
- Controls
Confirm that the anchor is appropriate for the boat and expected bottom conditions.
An anchor can be an important safety tool during engine failure or emergency drift.
Do not store the rode in a tangled or inaccessible condition.
Inspect Dock Lines and Fenders
Before departure, confirm that dock lines and fenders are:
- In good condition
- Properly sized
- Free from severe chafe
- Accessible
- Stored without blocking walkways
Keep at least one useful line ready for returning to the dock or assisting another vessel.
Do not leave loose dock lines where they can enter the water and reach a propeller.
Inspect the Towing Setup
If the vessel carries a tow line, confirm that it is:
- Strong enough
- Free from major damage
- Properly stored
- Accessible
- Suitable for the intended use
Towing another boat involves significant forces and risks.
Use proper attachment points and follow safe procedures.
Untrained passengers should not handle loaded lines.
Check Fresh Water
Carry enough drinking water for every passenger, plus a reasonable reserve.
Hot weather, sun, wind, and seasickness increase fluid needs.
Do not rely only on sugary drinks, alcohol, or a single small cooler.
Store water where it remains accessible.
Alcohol can impair judgment, balance, hydration, and emergency response.
The boat operator should remain fully capable of operating the vessel safely.
Pack Food Safely
Choose food that is:
- Easy to store
- Protected from contamination
- Simple to eat
- Appropriate for the trip length
- Separated from bait and fish
Use clean coolers for food and drinks.
Do not place food directly beside:
- Cut bait
- Fish blood
- Dirty gloves
- Fishing tools
- Used towels
Bring light snacks for passengers prone to seasickness.
Load Enough Ice
Ice may be needed for:
- Catch preservation
- Food storage
- Drinks
- Emergency cooling
Estimate the amount based on trip length, air temperature, fish size, and cooler performance.
Do not overload the boat.
Ice and water are heavy.
Secure coolers so they cannot slide during turns or rough seas.
Check Boat Loading and Weight Distribution
Do not exceed the boat’s rated capacity.
Consider the combined weight of:
- Passengers
- Fuel
- Water
- Ice
- Coolers
- Fishing equipment
- Bait
- Batteries
- Safety gear
- Catch
Distribute weight according to the boat manufacturer’s guidance.
Poor loading may affect:
- Stability
- Planing
- Fuel consumption
- Drainage
- Steering
- Visibility
Heavy items should be secured low and appropriately positioned.
Secure Coolers and Tackle
Any loose object can become dangerous when the boat crosses a wake.
Secure:
- Coolers
- Tackle boxes
- Bait containers
- Buckets
- Bags
- Spare anchors
- Tools
- Dive gear
- Battery packs
Keep walkways and access to safety equipment clear.
Do not rely on an object’s weight alone to keep it in place.
Inspect Rods and Reels
Before departure, check:
- Rod guides
- Reel seats
- Line
- Leaders
- Drags
- Handles
- Knots
- Terminal tackle
- Hook keepers
Replace damaged line and cracked guides before fishing.
A guide insert can damage line under pressure.
Secure hooks so they cannot swing during the boat ride.
Organize Tackle by Fishing Plan
Avoid bringing every item in the garage.
Organize tackle for:
- Target species
- Water depth
- Bait type
- Trolling
- Jigging
- Bottom fishing
- Backup rigs
Label boxes and store them where they are accessible without blocking the deck.
Prepare common leaders and rigs before departure.
Tying complex systems during rough water increases the chance of dropped tools and hook injuries.
Check Bait Storage
Keep bait:
- Cold
- Contained
- Separated from food
- Protected from leakage
- Organized for easy access
Inspect bait bags and containers for damage.
A leaking bait package can contaminate coolers, tackle bags, and the deck before the boat leaves the marina.
Bring a secure container for used bait packaging.
Inspect Landing Equipment
Depending on the target species, inspect:
- Landing nets
- Gaffs
- Harpoons where legal and appropriate
- Fish grips
- Dehookers
- Gloves
- Measuring tools
- Fish bags
Check for:
- Corrosion
- Loose handles
- Damaged netting
- Exposed hooks
- Cracked grips
- Missing covers
Store landing equipment where it is available but not in an active walkway.
Check Fishing Licenses and Regulations
Confirm that required licenses, permits, and vessel documents are onboard or accessible as required.
Review current regulations for:
- Seasons
- Bag limits
- Size limits
- Closed areas
- Protected species
- Gear restrictions
- Reporting requirements
Fishing regulations can change.
Use current official information for the location and date of the trip.
Do not rely on a regulation summary saved from a previous season.
Inspect the Deck Surface
Before departure, check the walking areas for:
- Fish slime from the previous trip
- Soap residue
- Oil
- Mud
- Loose mats
- Standing water
- Raised edges
- Damaged non-skid
- Fishing line
- Hooks
The deck should be clean before passengers begin loading equipment.
Traction problems are easier to correct at the dock than during offshore fishing.
Check Deck Boots and Footwear
Passengers should wear secure, closed-toe footwear appropriate for wet marine surfaces.
Useful characteristics include:
- Stable fit
- Wet-deck outsole
- Closed toe
- Manageable weight
- Appropriate cushioning
- Easy-clean construction
- Suitable boot height
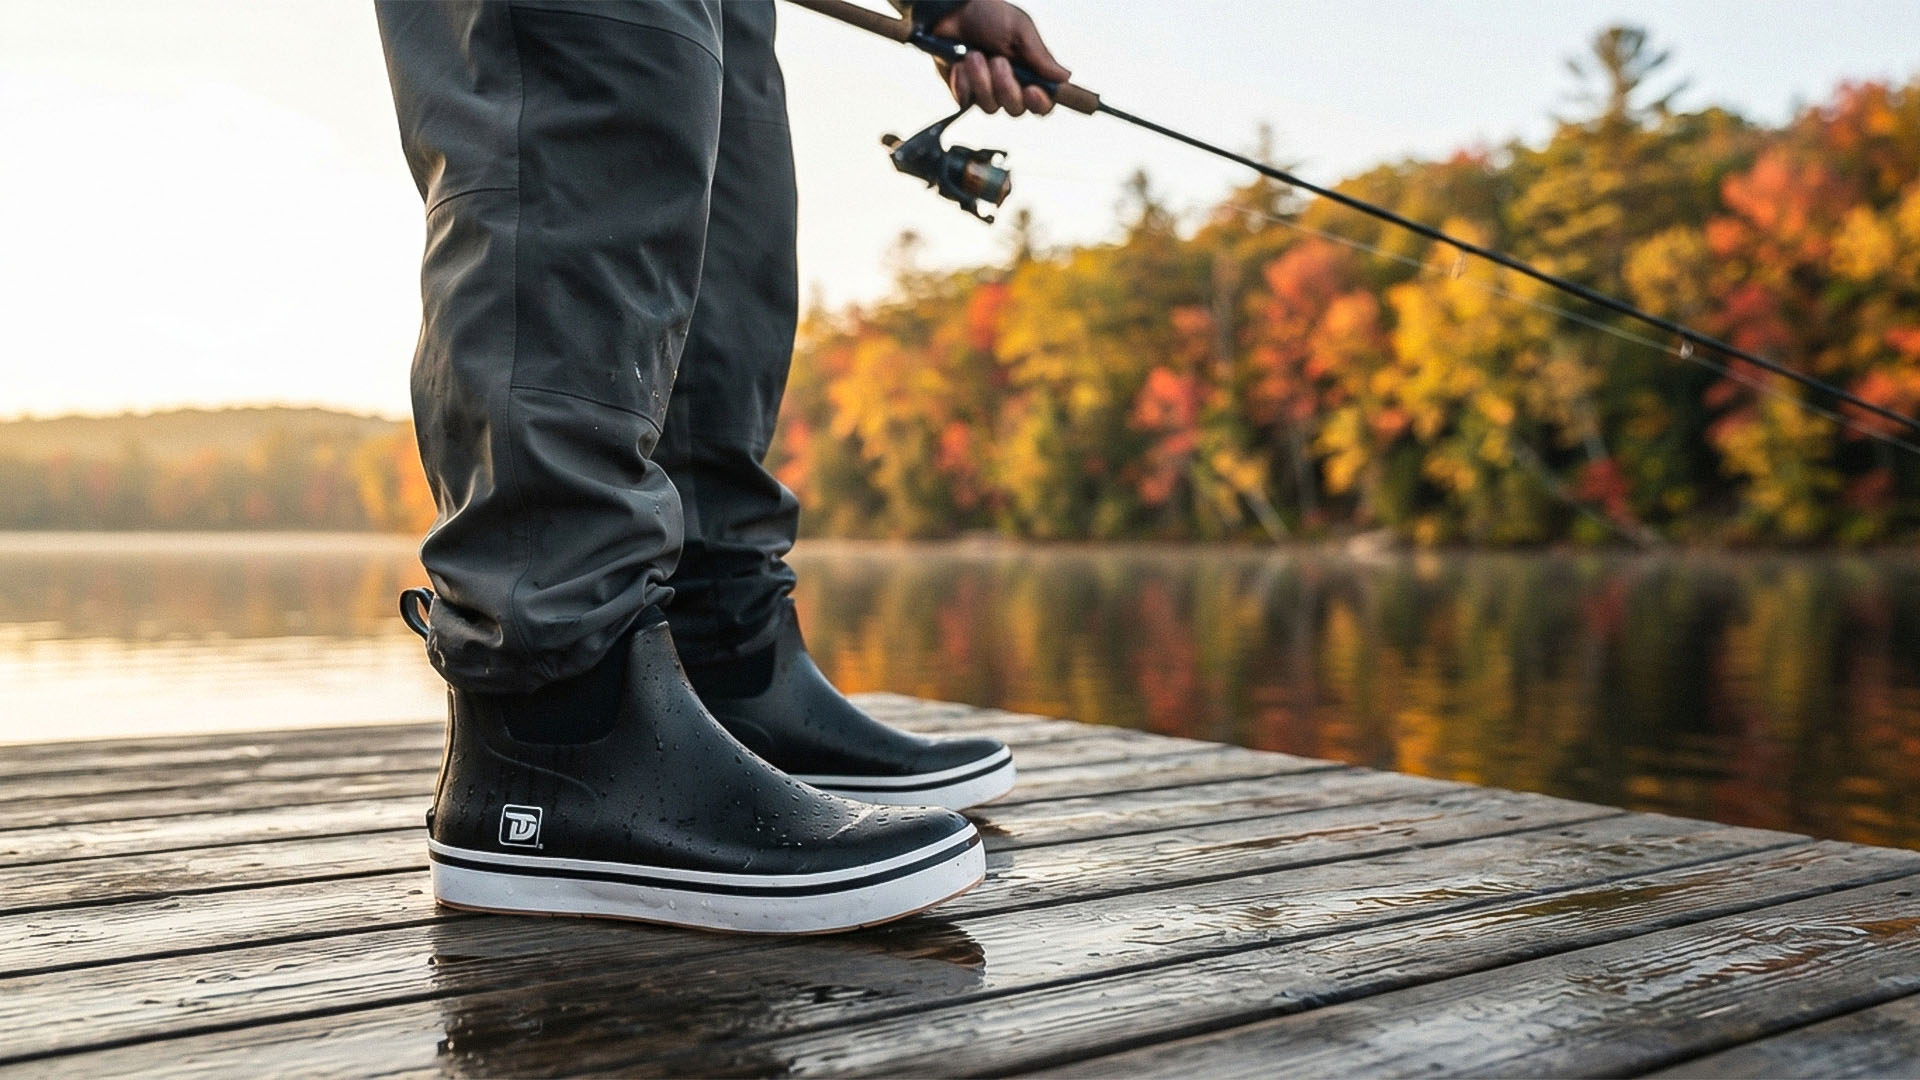
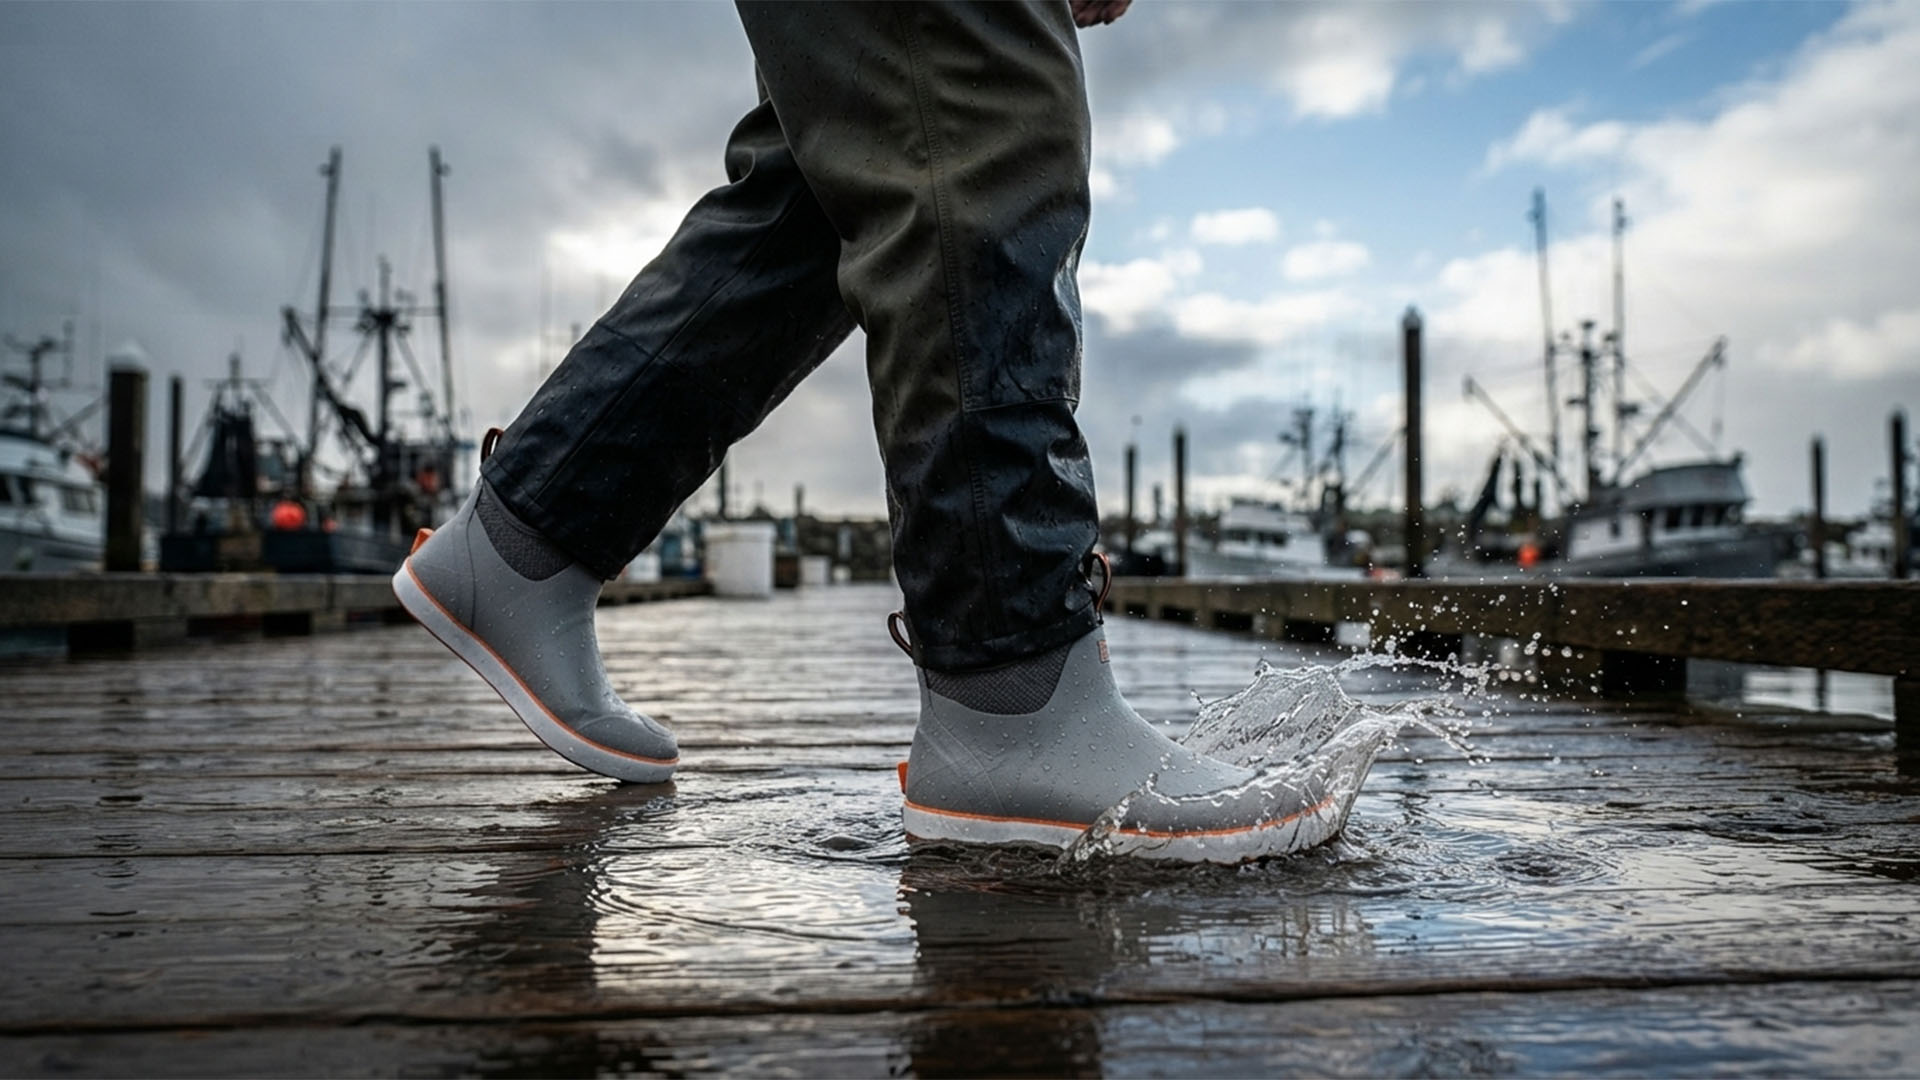
Waterproof ankle deck boots are useful for rain, spray, shallow standing water, fish slime, and washdowns.
Anglers evaluating offshore fishing footwear can compare TruDaveGear waterproof deck boots with other marine-focused options based on fit, outsole design, cushioning, boot height, and weather conditions.
Avoid flip-flops and loose sandals around hooks, sinkers, fish spines, and wet decks.
Inspect Boot Tread
Before boarding, remove:
- Mud
- Gravel
- Fish scales
- Bait
- Oil
- Soap
- Seaweed
- Fishing line
Check for embedded hooks.
Clean tread provides better contact with the boat deck.
Replace footwear when:
- Grooves are smooth
- Rubber is hard
- Outsole is separating
- Fit is unstable
- Cracks are present
- Wet-surface performance has declined
Pack Weather-Appropriate Clothing
Offshore weather may be colder or wetter than conditions at the marina.
Bring:
- Moisture-wicking shirt
- Long-sleeve sun protection
- Quick-drying pants
- Waterproof jacket
- Fishing bibs
- Warm mid layer
- Secure hat
- Neck gaiter
- Gloves
- Spare socks
Avoid heavy cotton clothing.
Cotton holds sweat and water, then dries slowly.
Use layers that can be removed as conditions change.
Pack a Complete Dry Clothing Set
A dry shirt alone may not be enough after heavy spray or rain.
Pack in waterproof storage:
- Shirt
- Pants
- Underwear
- Socks
- Warm layer
- Hat
- Towel
Cold wet clothing can become uncomfortable during the return trip.
A complete dry set is particularly important during cold-water fishing and long offshore runs.
Use a Dry Bag
Store moisture-sensitive items in a proper dry bag or waterproof case.
Possible contents include:
- Phone
- Wallet
- Keys
- Medication
- Documents
- Spare clothing
- Batteries
- Backup glasses
- Chargers
Do not assume every boat compartment remains dry.
Keep clean clothing separate from bait, fish, dirty gloves, and deck boots.
Check Sun Protection
Offshore ultraviolet exposure can be intense because light reflects from the water.
Bring:
- Broad-spectrum sunscreen
- Lip protection
- Polarized sunglasses
- Secure hat
- Neck gaiter
- Long-sleeve sun shirt
- Sun gloves
Apply sunscreen before departure and reapply according to the product directions.
Pay attention to:
- Ears
- Neck
- Hands
- Lower face
- Tops of feet when exposed
- Areas around clothing openings
Check Lighting
Even a planned daylight trip may return after dark.
Carry:
- Working deck lights
- Flashlights
- Headlamps
- Spare batteries
- Backup handheld light
Avoid shining bright lights into the operator’s eyes.
Use lights to identify lines, hooks, equipment, and boarding areas.
Waterproof or water-resistant construction is useful in marine environments.
Inspect the Boat Ladder
Confirm that boarding equipment is:
- Accessible
- Functional
- Secure
- Known to passengers
- Deployable from the water when required
A person in the water may not be able to climb a high transom without assistance.
Do not block the ladder with coolers, fishing gear, or tied equipment.
Conduct a Passenger Safety Briefing
Before leaving the dock, the captain should explain:
- PFD locations
- Fire-extinguisher locations
- Radio location
- Emergency-beacon location
- First-aid kit location
- Throwable-device location
- Safe seating
- Handholds
- Toilet procedures
- No-go areas
- Hook and gaff safety
- Man-overboard response basics
Identify at least one passenger who could operate the radio and bring the boat back if the captain becomes unable to do so.
Explain Man-Overboard Response
Passengers should understand the immediate priorities:
- Shout clearly
- Keep the person in sight
- Point continuously
- Throw flotation
- Alert the captain
- Avoid entering the water unnecessarily
- Keep lines away from propellers
The captain should know the boat-specific recovery method.
A practice discussion at the dock is better than trying to explain everything during an emergency.
Explain Hook and Gaff Safety
Offshore fishing equipment can cause serious injuries.
Set clear rules for:
- Securing hooks
- Moving rods
- Carrying gaffs
- Storing knives
- Leader handling
- Casting zones
- Landing fish
- Fish-box access
Do not leave baited hooks loose on the deck.
Use covers or secure storage for sharp landing equipment.
Check the Head or Toilet
Before departure, confirm that the marine toilet system is:
- Functional
- Supplied
- Understood by passengers
- Used according to legal discharge requirements
Carry appropriate sanitation supplies.
Explain what can and cannot enter the system.
Improper materials may cause blockages during the trip.
Check Trash Storage
Bring secure containers for:
- Food packaging
- Bait packaging
- Used line
- Damaged tackle
- Cleaning wipes
- Personal waste
Do not allow loose trash to blow overboard.
Separate fishing line and sharp objects from ordinary waste.
Close bags securely.
Review Emergency Ports and Alternate Plans
Identify safe options along the route.
Know:
- Nearest ports
- Fuel docks
- Tow-service contacts
- Emergency channels
- Coast Guard or local rescue information
- Medical facilities near the marina
- Sheltered areas
- Alternate fishing locations
A flexible plan allows the captain to change direction when weather, mechanical issues, or passenger health requires it.
Check Tow-Service Membership and Contact Information
Where applicable, confirm that towing coverage and contact information are current.
Store the details:
- On the phone
- In the chartplotter notes
- On a waterproof card
- With vessel documents
Towing service does not replace emergency communication or mechanical preparation.
Response times may be long offshore.
Confirm Vessel Documents
Carry required documentation, which may include:
- Registration
- Insurance information
- Radio licenses where applicable
- Fishing permits
- Charter documents
- Equipment certificates
- Emergency contacts
Keep documents protected from water.
Know which documents must be physically onboard and which may be accepted electronically under local rules.
Complete a Final Walk-Around
Immediately before departure, walk through the boat from bow to stern.
Confirm:
- Hatches closed
- Dock lines ready
- Fenders positioned
- Coolers secured
- Safety gear accessible
- Fuel sufficient
- Engines normal
- Electronics working
- Drains clear
- Passengers seated
- Walkways open
- Rods secured
- Hooks covered
- Weather still acceptable
A final walk-around catches items that may have changed during loading.
Check the Waterline After Launch
Once the boat is in the water, inspect for:
- Unexpected low position
- Uneven list
- Water entering the bilge
- Leaking fittings
- Blocked scuppers
- Improper loading
- Loose dock lines
Listen for bilge pumps operating continuously.
A pump running more than expected may indicate water intrusion.
Do not leave the dock until the cause is understood.
Perform a Low-Speed Systems Check
Before entering open water, confirm:
- Steering
- Shifting
- Throttle
- Engine temperature
- Charging voltage
- Trim
- Electronics
- Bilge systems
- Navigation lights when required
Keep the first part of the trip conservative.
A problem found near the marina is easier to manage than the same problem discovered offshore.
Update the Float Plan at Departure
Send a final message to the responsible person with:
- Actual departure time
- Passenger count
- General destination
- Expected return time
- Any route changes
Send another update after returning.
The responsible person should not have to guess whether the trip ended safely.
Offshore Fishing Departure Checklist
Weather and Planning
- Check marine forecast
- Check wind and waves
- Review radar
- Review tides and currents
- Establish no-go conditions
- Plan route
- Identify alternate ports
- File float plan
Hull and Plumbing
- Inspect hull
- Install drain plug
- Check through-hulls
- Inspect hoses and clamps
- Check bilge
- Test bilge pumps
- Clear scuppers
- Inspect drains
Fuel and Engines
- Confirm fuel quantity
- Inspect fuel lines
- Check filters
- Check fluids
- Inspect propellers
- Test trim and steering
- Start engines
- Verify cooling flow
- Check gauges and alarms
Electrical Systems
- Check batteries
- Inspect terminals
- Test charging
- Confirm switch positions
- Inspect wiring
- Test navigation lights
- Charge backup devices
Navigation and Communication
- Test chartplotter
- Check GPS
- Test depth sounder
- Test radar
- Check compass
- Test VHF radio
- Verify DSC information
- Inspect EPIRB or PLB
- Charge handheld radios
Safety Gear
- PFD for every person
- Throwable flotation
- Fire extinguishers
- Distress signals
- Horn and whistle
- First-aid kit
- Emergency tools
- Damage-control supplies
- Working ladder
- Passenger safety briefing
Anchoring and Docking
- Inspect anchor
- Check chain and rode
- Inspect windlass
- Check dock lines
- Check fenders
- Carry tow line
- Keep boarding area clear
Fishing Equipment
- Inspect rods
- Check reels
- Inspect line and leaders
- Secure hooks
- Organize tackle
- Store bait safely
- Inspect nets and gaffs
- Confirm licenses and regulations
Clothing and Footwear
- Waterproof jacket
- Fishing bibs
- Sun-protective clothing
- Warm layer
- Secure hat
- Gloves
- Deck boots
- Moisture-wicking socks
- Spare socks
- Dry clothing set
Food and Personal Gear
- Drinking water
- Food and snacks
- Ice
- Medication
- Seasickness supplies
- Sunscreen
- Sunglasses
- Dry bag
- Phone protection
- Tow-service information
Final Departure Check
- Boat loaded safely
- Weight distributed
- Coolers secured
- Hatches closed
- Walkways clear
- Drains clear
- Safety gear accessible
- Passengers briefed
- Weather rechecked
- Float plan updated
Common Offshore Preparation Mistakes
Checking Only the Air Forecast
Wind, wave period, current, and visibility also matter.
Trusting the Fuel Gauge Without Planning
Fuel consumption changes with sea conditions and boat load.
Burying Safety Gear
Emergency equipment must remain accessible.
Ignoring Small Bilge Water Changes
New water needs an explanation.
Leaving Navigation Lights Untested
A daylight trip may return after dark.
Bringing One Communication Device
Offshore communication should have appropriate backups.
Loading Too Much Gear
Excess weight affects stability, fuel use, and deck organization.
Wearing Flip-Flops
Open footwear provides limited protection from hooks, fish spines, and wet decks.
Forgetting Dry Clothing
Rain and spray can soak passengers far from shore.
Failing to Brief Passengers
People cannot assist effectively when they do not know where equipment is located.
Ignoring a Warning Alarm
Alarms should be investigated before departure.
Departing Because Everyone Already Arrived
Schedule pressure should not override weather or mechanical concerns.
Final Thoughts
A reliable offshore fishing trip begins with a careful inspection at the dock.
Check the weather, route, fuel, engines, batteries, bilge pumps, drains, electronics, communication equipment, and safety gear before departure.
Inspect the anchor, dock lines, coolers, fishing equipment, clothing, and footwear.
Confirm that every passenger has an appropriate flotation device and understands where emergency equipment is located.
Carry enough fuel, water, food, ice, medication, spare clothing, and communication backup for the planned trip and a reasonable delay.
Keep the deck organized.
Secure heavy equipment.
Cover hooks.
Clear fishing line, hoses, tackle boxes, and bags from walking areas.
Wear closed-toe marine footwear with a secure fit and an outsole suited to wet hard surfaces.
Do not ignore unusual smells, warning alarms, leaks, low voltage, weak starting, steering problems, or unexpected bilge water.
A small concern at the dock may become a serious problem offshore.
Use the boat manufacturer’s instructions, current weather information, official boating requirements, and experienced captain judgment as the final authority.
The purpose of a checklist is not to make offshore fishing feel complicated.
It is to make preparation consistent.
When the boat is fueled, tested, organized, and equipped before leaving the marina, everyone onboard can spend more time focusing on safe navigation, changing conditions, and the fishing experience.
Frequently Asked Questions
What should I check before taking a boat offshore?
Check weather, fuel, engines, batteries, bilge pumps, drains, steering, electronics, communication equipment, safety gear, anchor, fishing tackle, clothing, and passenger information.
How much fuel should I carry offshore?
Carry enough for the planned route, fishing activity, changing sea conditions, detours, and a significant reserve. Use vessel-specific fuel-consumption records rather than estimates alone.
Should I file a float plan?
Yes. Share the boat information, passenger list, destination, route, and expected return time with a responsible person who is not onboard.
What safety equipment is needed for offshore fishing?
Requirements vary by boat and location but may include PFDs, throwable flotation, fire extinguishers, distress signals, sound devices, first-aid supplies, communication equipment, and emergency beacons.
Is a cell phone enough for offshore communication?
No. Cell coverage may be limited. A marine VHF radio and appropriate emergency communication backups are important.
Should I test the bilge pump before every trip?
Yes. Confirm that automatic and manual functions work and that water can discharge properly.
Why should I check scuppers before departure?
Blocked scuppers can allow rain, spray, and washdown water to collect on the deck.
What footwear should I wear offshore fishing?
Wear secure closed-toe footwear with wet-deck traction, stable cushioning, and appropriate water protection. Waterproof ankle deck boots work well for many recreational trips.
Are flip-flops safe on an offshore fishing boat?
They are generally not recommended because they provide limited protection from hooks, fish spines, sinkers, knives, and wet decks.
What clothing should I bring offshore?
Bring moisture-wicking clothing, sun protection, a waterproof jacket, fishing bibs, a warm layer, gloves, a secure hat, spare socks, and a complete dry clothing change.
How often should marine weather be checked?
Check it during trip planning, before leaving home, at the marina, and periodically during the trip.
What should I do if an engine warning alarm appears at the dock?
Identify and correct the cause before departure. Do not assume the alarm will clear after the boat reaches open water.
Should passengers receive a safety briefing?
Yes. They should know the locations of PFDs, fire extinguishers, radios, emergency beacons, first-aid supplies, and throwable flotation.
What should be included in a boat emergency tool kit?
The kit may include basic hand tools, spare fuses, clamps, plugs, flashlights, absorbent material, manufacturer-specific tools, and damage-control supplies.
Should I inspect fishing regulations before every trip?
Yes. Seasons, size limits, bag limits, closed areas, and gear rules can change.
What is the final check before leaving the dock?
Recheck weather, engines, fuel, electronics, safety equipment, hatches, drains, passenger seating, gear security, deck organization, and the float plan.